The starting point of this tutorial is that I add some breakaway headers to the XBee’s USB breadboard adapter.
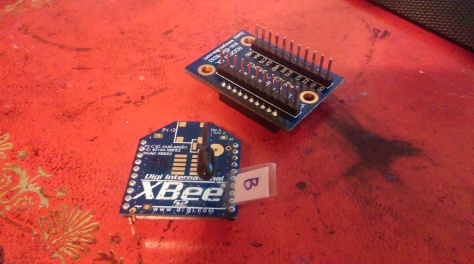
This is the “B” module from my previous tutorial… and we will start asumming that the XBee has been set up using that tutorial.
XBee 001 Basic example: radio-chat between 2 PC
So, what are we going to do?
We will have an Arduino board connected by USB to one computer and by radio (using a pair of XBee) to another computer. Using one computer or the other we are going to switch LED on and off.
Step 1. Make the electrical connections. We connect 3 LED to pins 9,9,10 on the Arduino. Remember to use an appropriate resistor to limit the amount of current. Use the ground on the Arduino to close the circuit.
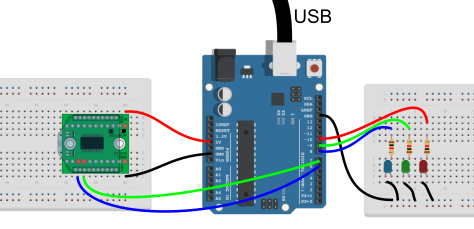
To be able to communicate with the XBee you need to power it (+5V to pin VDD and ground to VSS pin), the Arduino can provide enough power, so use it. Connect pin 7 to DIN and pin 6 to DOUT. These two pins are going to be used for serial communication between the Arduino and the XBee.
For other alternatives to communicate between a microcontroler and the XBee, the parallax webpage gives a good support here.
Step 2. The code. As you can see, the code comments explain what it does. Simply reads from Serial (USB) or from the new serial defined in ports 6 and 7 to comunicate with the XBee. Depending on what we read from the Serial, we turn on one LED or other.
//Arduino serial comunication happens through the USB or on the pins TX and RX
//including this file allows us to create another Serial port using pins 6 and 7
#include <SoftwareSerial.h>
#define Rx    6                // DOUT to pin 6
#define Tx    7                // DIN to pin 7
SoftwareSerial Xbee (Rx, Tx);

//Some variables for the LEDs and reading the Serial
int blue_led = 8;
int green_led = 9;
int red_led = 10;
char incoming ='empty';

void setup(){
  Serial.begin(9600);  // start serial port at 9600 bps:
  Xbee.begin(9600);
  pinMode(red_led, OUTPUT);
  pinMode(blue_led, OUTPUT);
  pinMode(green_led, OUTPUT);
}

void loop(){
  if(Serial.available()){
    //If there is data on the Serial port, read it and ligth the corresponding lights
    incoming = Serial.read();
    lights (incoming);
  }
  if(Xbee.available()){
    //If there is data on the XBeeSerial port, read it and ligth the corresponding lights
    incoming = Xbee.read();
    lights (incoming);
  }
}

int lights(char incoming){
  switch (incoming){
    case 'red':
    //Turn on the red LED
    digitalWrite(red_led, HIGH);
    digitalWrite(blue_led, LOW);
    digitalWrite(green_led, LOW);
    break;
    case 'blue':
    //Turn on the blue LED
    digitalWrite(red_led,LOW );
    digitalWrite(blue_led, HIGH);
    digitalWrite(green_led, LOW);
    break;
    case 'green':
     //Turn on the green LED
     digitalWrite(red_led, LOW);
     digitalWrite(blue_led, LOW);
     digitalWrite(green_led, HIGH);
     break;
     default :
     // default is optional
     break;

  }
}
Upload the code to your Arduino.
Setp 3. Communicate There is 2 ways of communication. First, using the same computer that is already connected by USB with the Arduino, open the Serial Monitor in the Arduino UI and write the colour of the LED you want to be on.
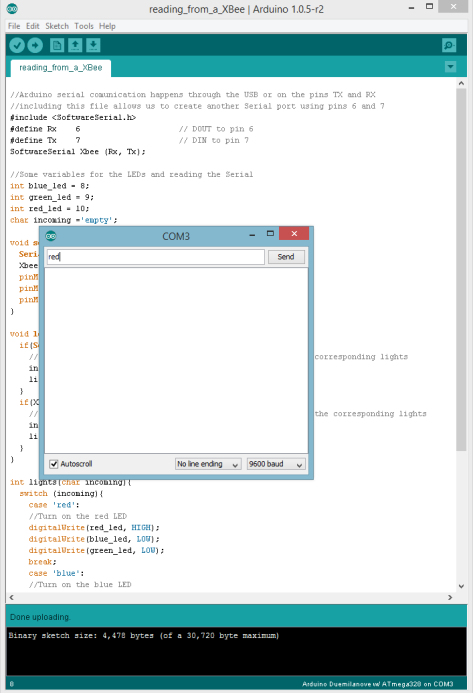
And the LED turns on.
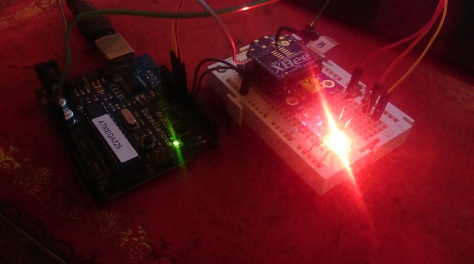
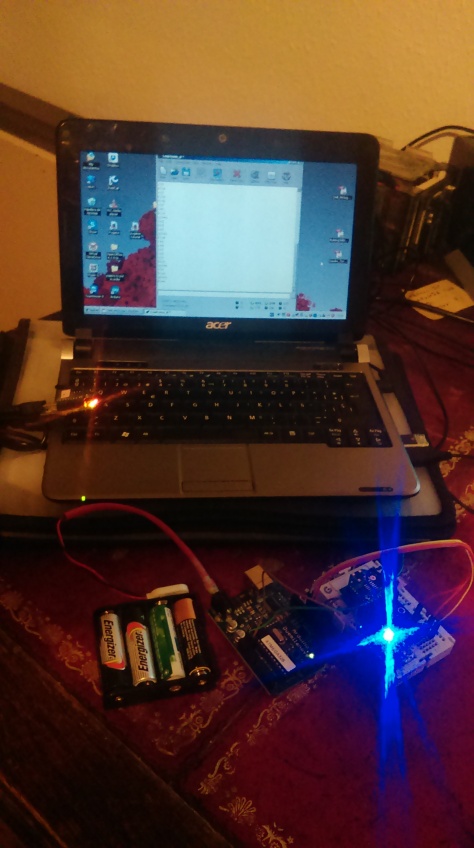
As you can see my electrical set-up is not as tidy as the schematic… but it works.
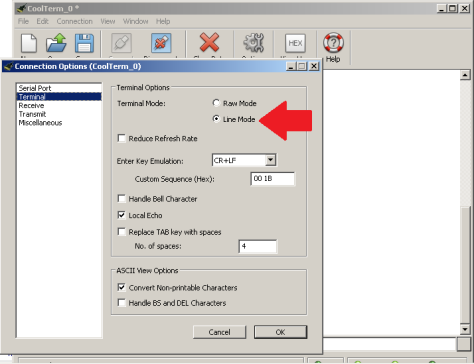
The second option is using the other XBee (from our previous tutorial) and the program CoolTerm to send data through the XBee. So, disconnect the USB from the Arduino and power it with batteries (or use one computer to power and another to communicate). Connect the “A” XBee with its USB adaptor to the computer and open CoolTerm program. The only change you need to do respect to the previous tutorial is enabling Line mode under Options>Terminal. This will enable sending one string at a time instead of individual characters.
Once this is done… it is ready for communication. Simply write the name of the colour you want.
Hope you find it useful… please, practise it if you can, because soon we are going to use this hack with something more funnier…
