This small project will help me later when I introduce a Matlab script I’m preparing, so stay tuned to the blog!
Today I’m going to do a simple example of data logging with Python and Arduino (my old Duemilanove). The Arduino is going to read a signal from a sensor and is going to report that value through the serial port. The Python script is going to scan the port from time to time and get the latest value. It’s not a clean implementation and can be improved, but it is an easy example.
But first, remember similar projects.

And of course, all the Python projects:
So, let’s begin.
Step 1. As a sensor I’m going to use a photodiode. Basically a photodiode works absorbing light and turning it into a voltage. To find out which terminal is the positive, simple connect the photodiode to a voltmeter and apply some light.

This model in particular is not very good for visible light (usually these models are designed to work at certain ranges, so maybe this one has its maximum sensitivity at IR or UV), but it will work.
Attach the photodiode between ground pin (GND) and Analog Input A0.

In this way we are going to read the voltage generated by the photodyode and detect the amount of ligth in the room.
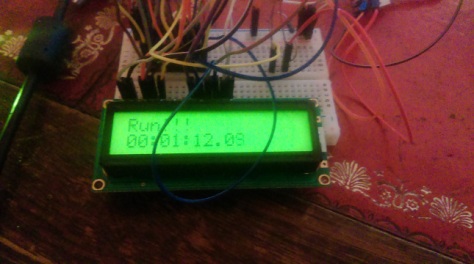
Step 2. Program the Arduino to read an analog input and write the value to the serial port. We already did it in the post (Raspberry Pi 001: Setup and Run first Arduino-Python project). But just in case, this is a simple program that reads pin A0 and writes the value (in volts) to the serial port.
int sensorPin = A0;    // select the input pin for the photodiode
int sensorValue = 0;  // variable to store the value coming from the sensor

void setup() {
Serial.begin(9600);// initialize serial communications at 9600 bps:
}

void loop() {
sensorValue = analogRead(sensorPin);  // read the value from the sensor:
// Convert value to volts and print the results to the serial monitor with 4 digits precision:
Serial.println(sensorValue*(5.00/1023.0),4);
delay(20);   // stop the program for for 20 milliseconds:
}
Upload the program to the Arduino and you will be ready. Just in case, check the serial monitor to see that the Arduino is sending the values and simply putting your hand over the sensor test if the values change.

Step 3. Write a Python code that reads the serial port, gets the last value and stores it.
import csv
import serial
import time

#First we create a name for the CSV file that is going to be date and time
name=time.strftime("%Y_%m_%d_%H_%M_%S", time.gmtime())
#Open the file
f=open(name+'.csv', 'wt');
#Initialize the CSV writer to write data into file
writer = csv.writer(f,delimiter='\t')

#Now we write a few lines to swhow how to write data
writer.writerow(['[Header]'])
date=time.strftime("%Y-%m-%d %H:%M:%S", time.gmtime())
writer.writerow(['date='+date])
writer.writerow(['Column1=Time'])
writer.writerow(['Column2=Voltage'])
writer.writerow(['[Data]'])

#Open the serial port. From the Arduino program we know the Arduino is in com3,
#and we selected 9600 as baudrate
ser = serial.Serial('com3',9600,timeout=1)

#For some reason, when the serial port is initialized,
#its first value is not real, so just read it and discard
kk=ser.readline();

#We are going to take 250 data points
for t in range(250):
    #Read last string from serial port
    kk=ser.readline()
    #String is in the form <value>\r\n we only need the <value>
    kk2=kk.split('\r',1)
    s=kk2[0]
    #We put each data point in a new row of the data file.
    writer.writerow((t*10,s))
    #waits 10 seconds for next data point
    time.sleep(10)

#When finish, close the file and the serial port.
f.close();
ser.close();
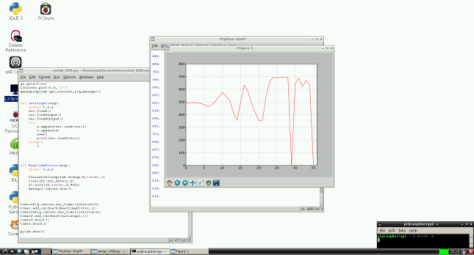
When we run this script it generates a data file that looks like this:

Now you can import the data into any program you like, for instance Open Office Calc.

Hope you find this interesting. Now you can try things like reading humidity sensor for a week, or saving home temperature, or any other idea you get.

